How to Move Your Wordpress Site From One Server ( or localhost) to Another Server?
Simple steps to deploy existing WordPress site
You need to follow some simple steps in the correct order :
- Create a backup of your WordPress site
- Move backup to your new server
- Setup site on the server
- Redirect site to your domain
- Create a backup of the site
First, we need you to backup your site to move this on a new server. For this, we are using a Wordpress plugin, called Duplicator.
Duplicator has a great rating on WordPress repository and it's free as well. Feel free while using this plugin because it will take the backup of all your database, themes and plugins as well.
So for backup, you have to follow the following steps :
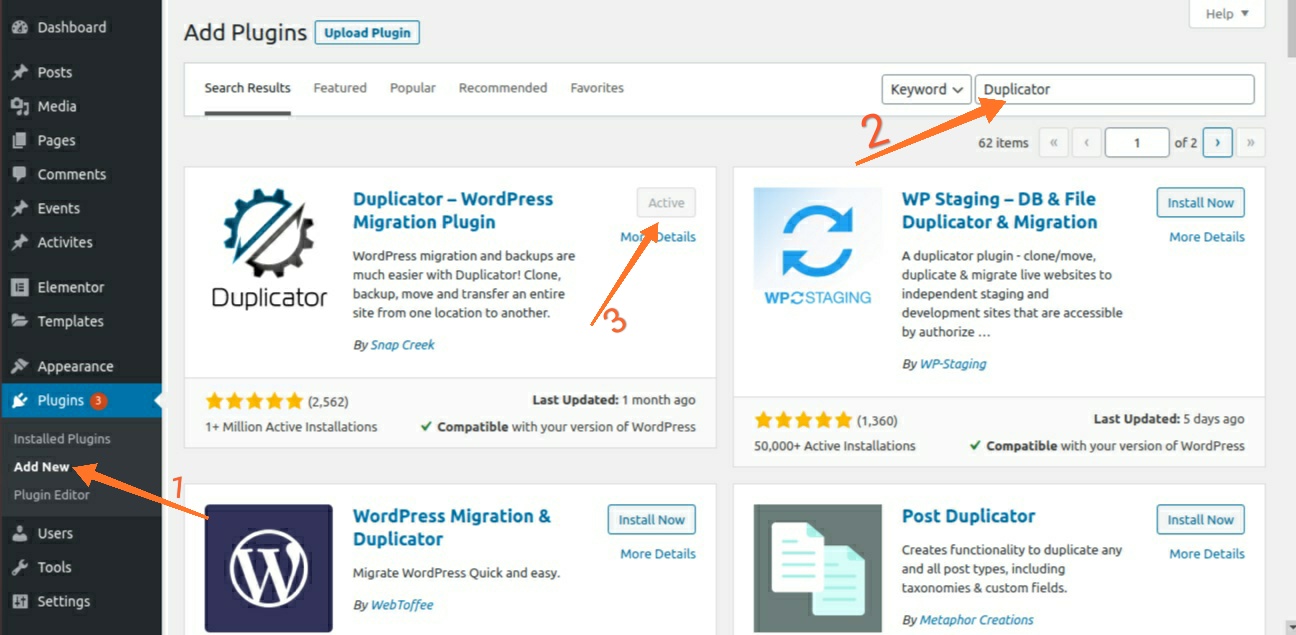
- Download and install Duplicator plugin on your local site
You can download the duplicator plugin from your WordPress site dashboard.
From dashboard navigate to Plugins ➡ Add New ➡ Search Duplicator ➡ click on Install Now ➡ click on Activate.
- Create a new package
Now you can see Duplicator in your dashboard. To create a new package, navigate to Duplicator ➡ Packages ➡ Create New.
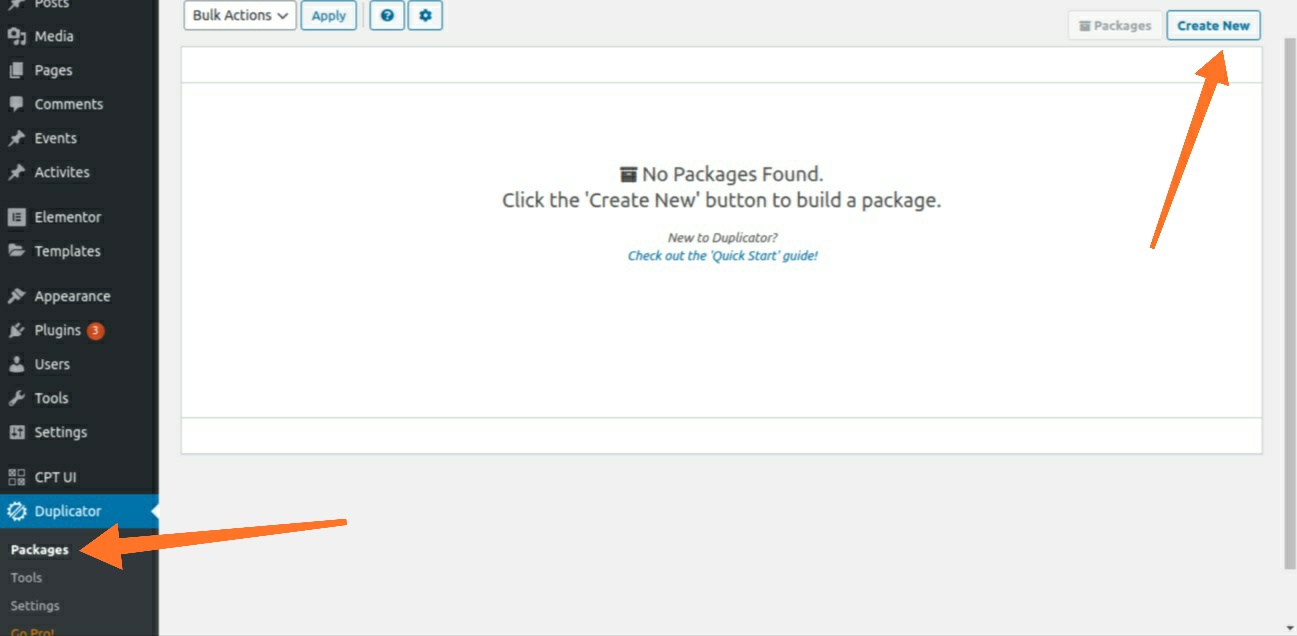
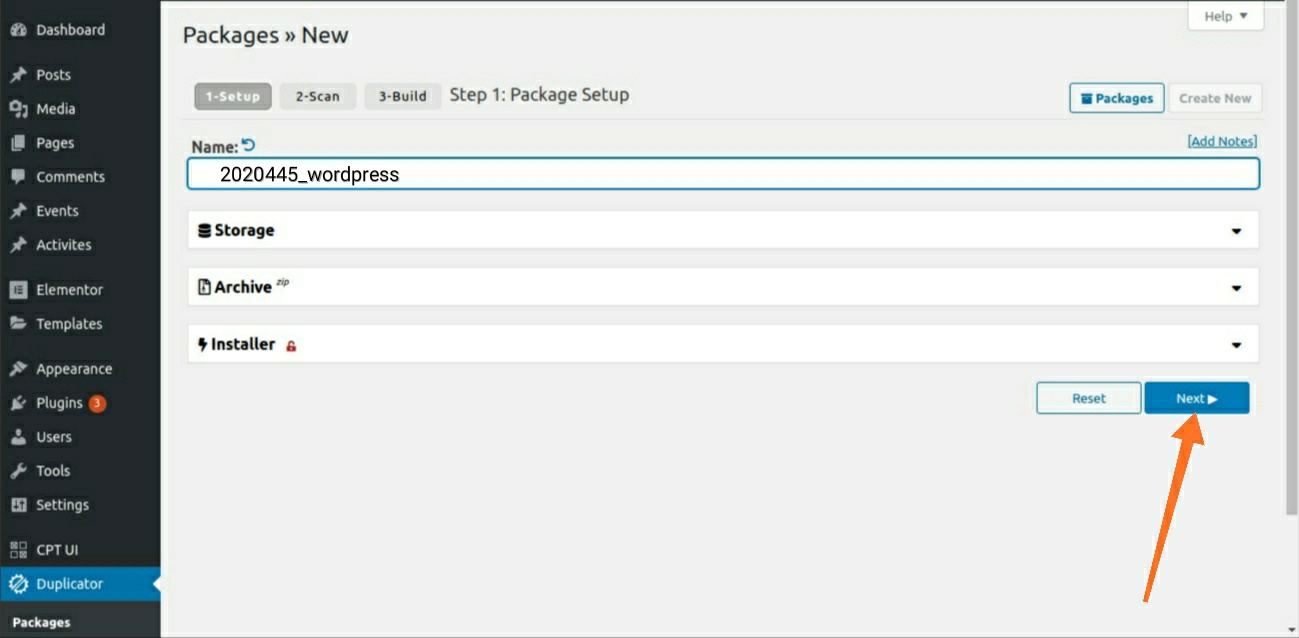
Here we have three steps :
1-Setup: Click on the Next button to start the process.
2-Scan: Click on the Build button.
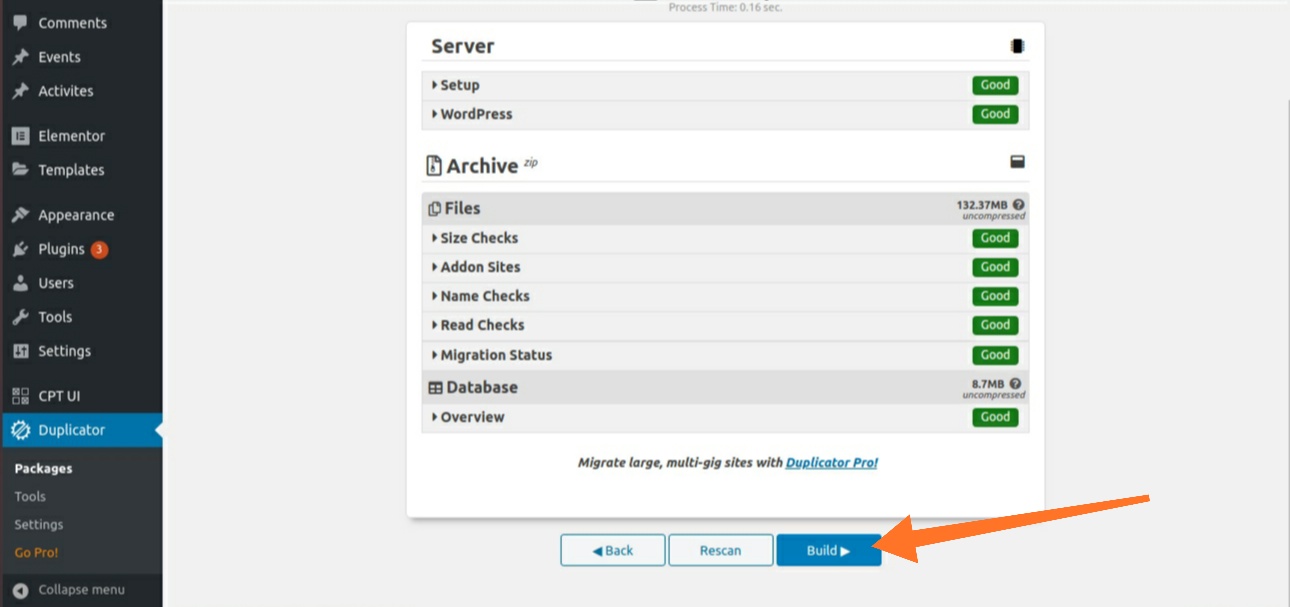
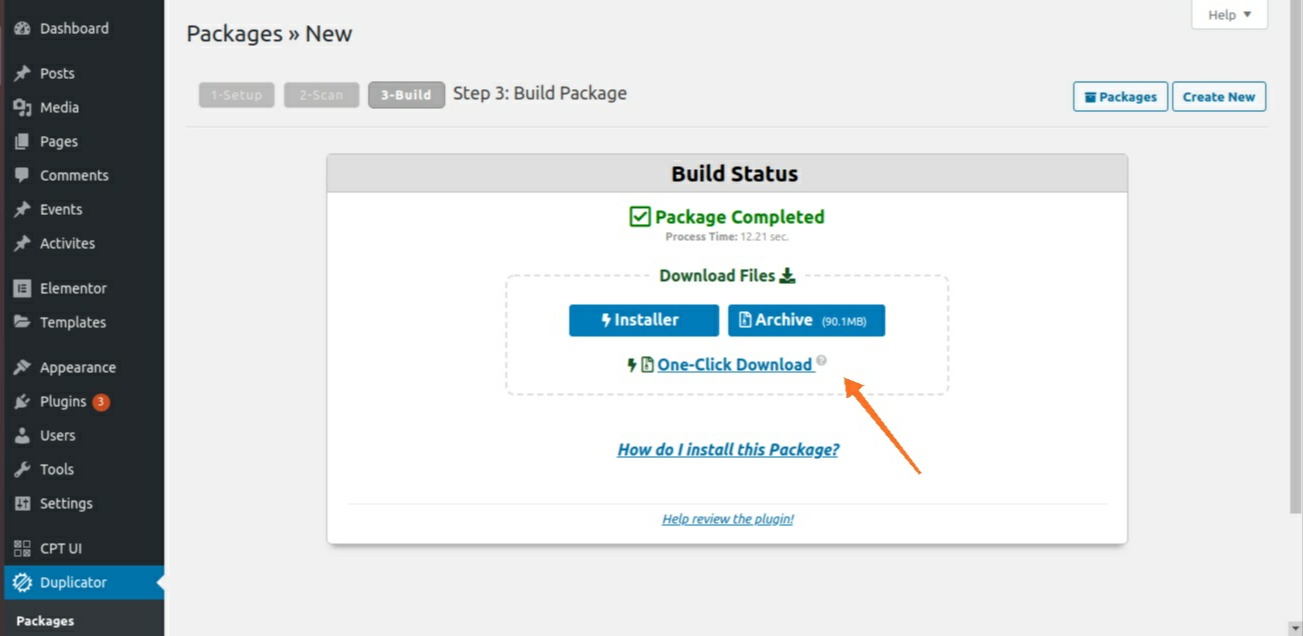
3-Build: Now download both the Installer and Archive files.
You can follow these steps also to backup your site. Now, we need to move our backup (these two files) to the server.
- Move your backup to the server
Let’s move your site to the server so that various approaches can be used. You can use your FTP client also, but here we are using an rsync command to send files from local to the server. For error-free installation follow given steps :
- Move your Installer and Archive files in a new folder. We have named it my_site .
- Now run the below command to move my_site folder on server:
$ rsync -avzhe ssh /my_site/ root@0.0.0.0:/var/www/html/
Here 0.0.0.0 must be replaced with your server IP address. Also /var/www/html directory is available on your server.
After running the command you can log into your server and check that files are available there.
- Setup site on the new server
All your local work has been finished. Now, let's set up your site at the server by simple steps:
- You need a database on the server. So, now create a new database for your WordPress site usingMySQL or PHPMyAdmin on your server.
- Fire up your browser and navigate to http://YourServerIP/installer.php
NOTE: If you got a permission error change the owner of your project directory on the server by running the following command :
$ chown www-data:www:data /var/www/html/my_site
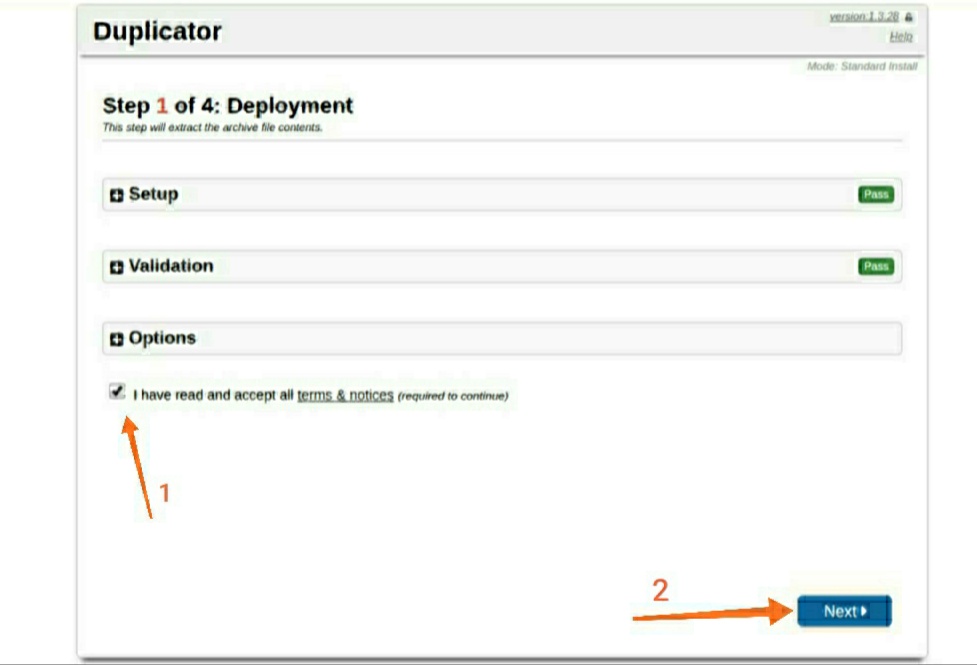
Here we have four steps for setup our site :
Step - 1: Here you can see the interface of installation. You need to accept the terms and click on Next button.
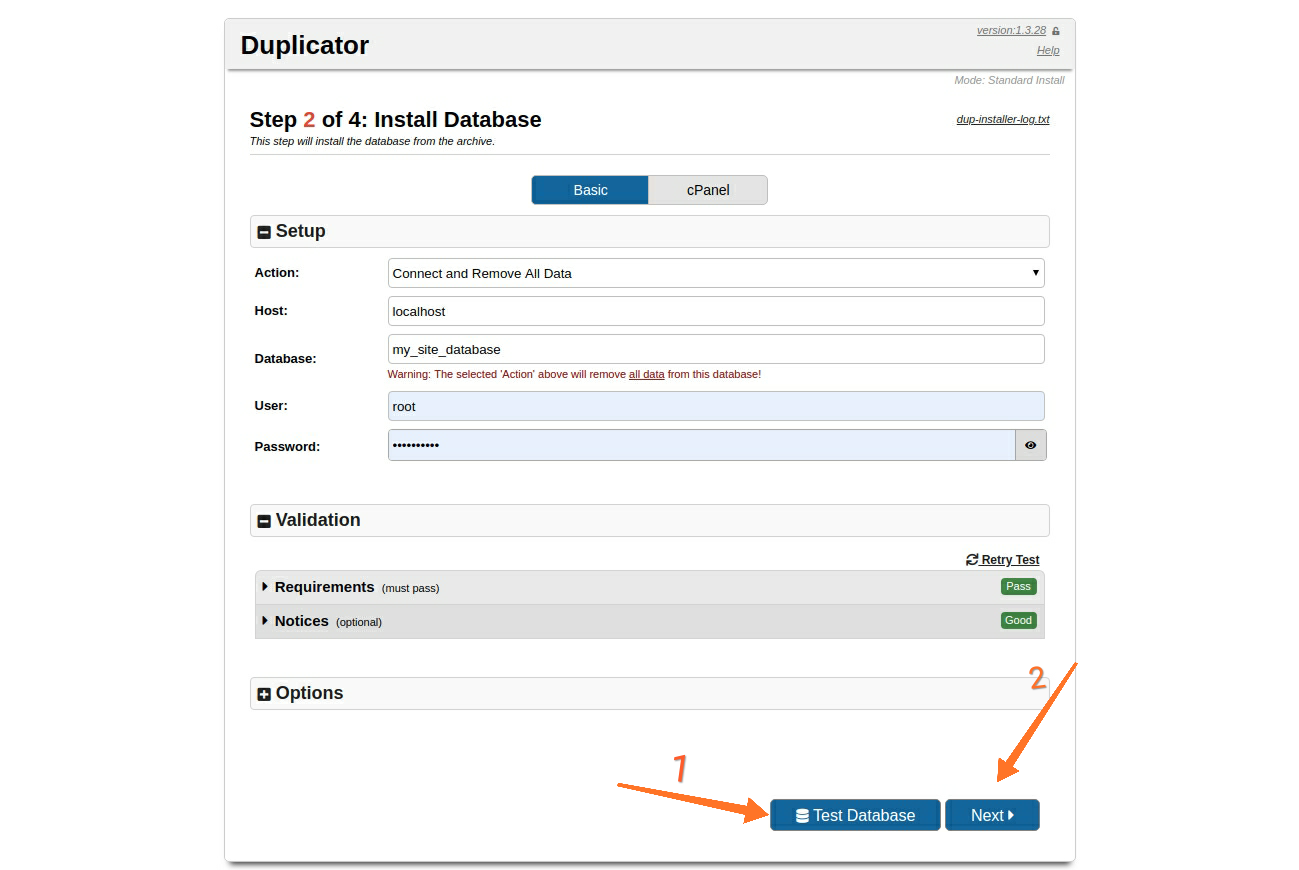
Step - 2: In this step, you need to configure your database by putting the database name with user_name and password of your database. Now test the database and click Next button.
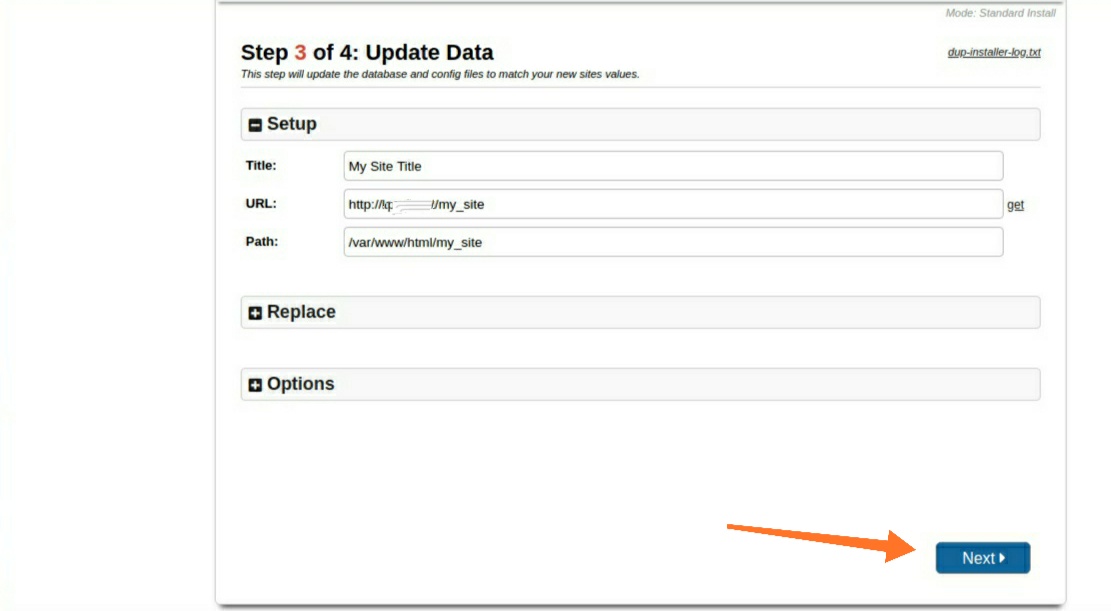
Step-3: Here no need to change just click the Next button.
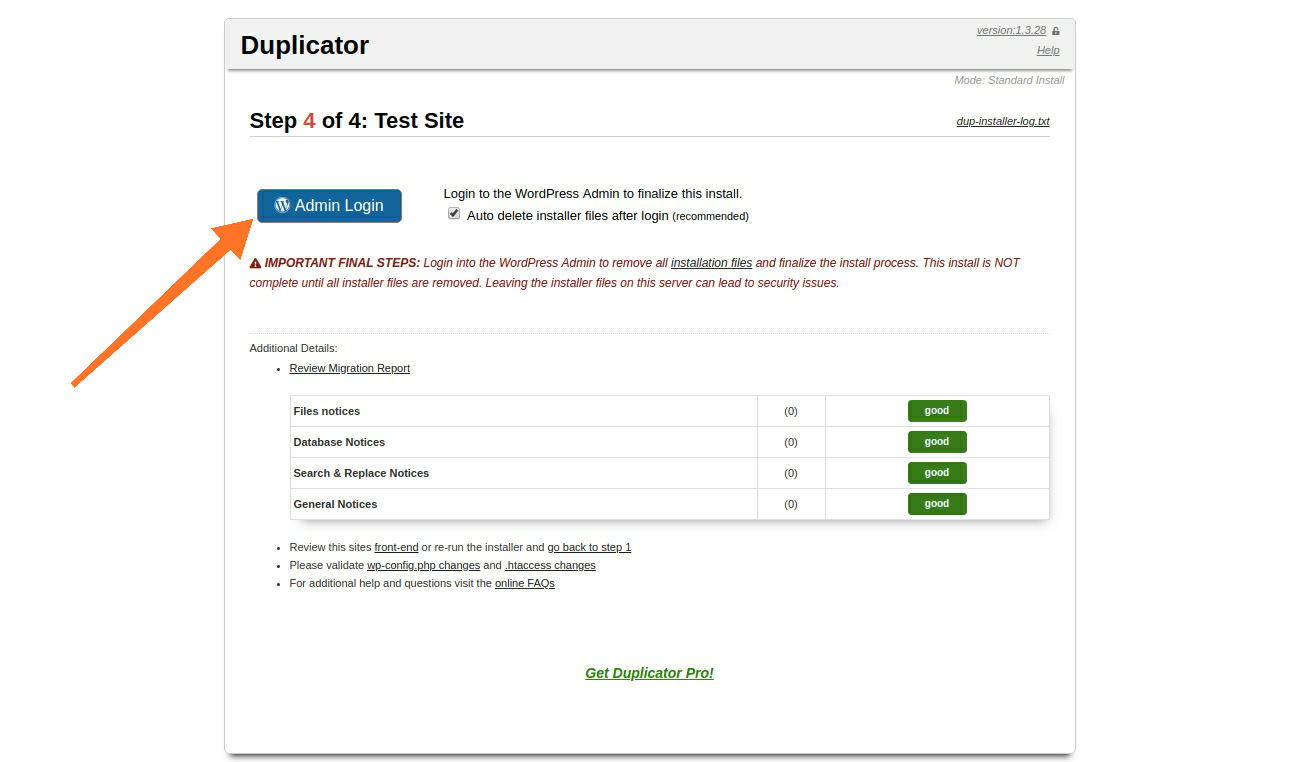
Step-4: Click on the Admin Login button and you see your WordPress website is live now.
Your Website is live now
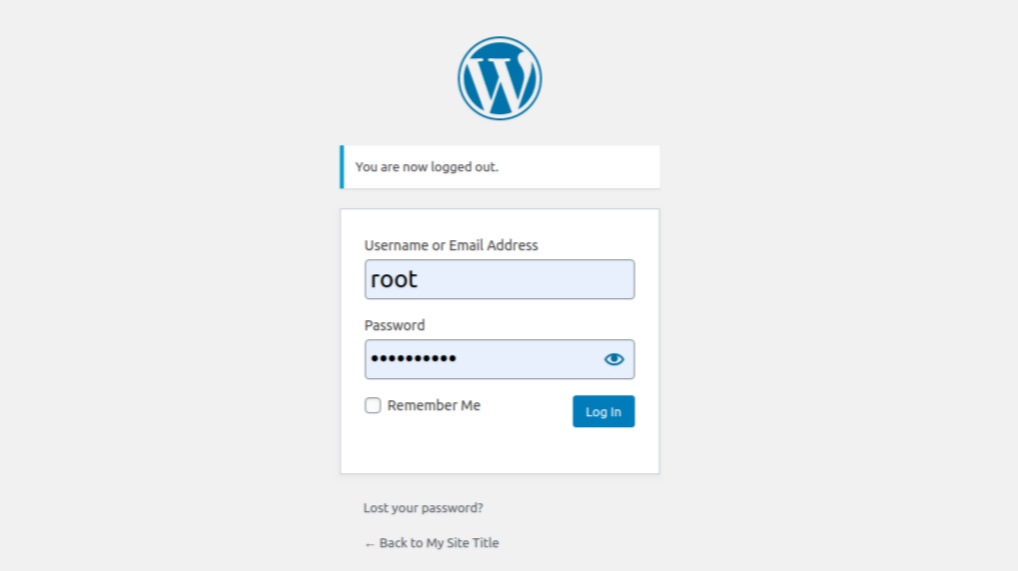
Your WordPress site is live on http://your_server_IP/my_site . You just need to put your Username and Password to login to your wp_admin dashboard.
- Redirect site to your domain
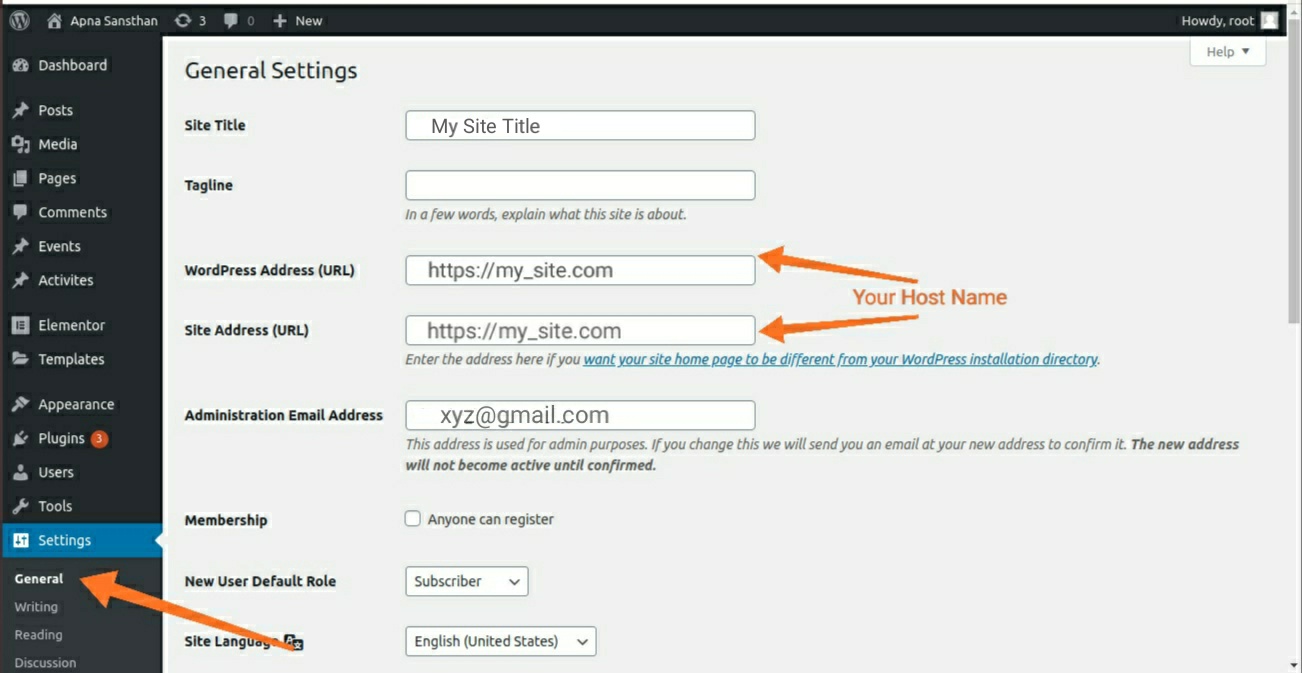
Now you need to configure your site to your hostname. So whenever your visitors type your website hostname they redirect to your website.
First, you need to change your Wordpress URL and Site URL from your WordPress dashboard and save this.
- Now we need a virtual host on our server. For this we are going to use apache server. You just need to create a conf in /etc/apache2/site-available/ for your website. A sample conf file for my site my_site.conf is given bellow :
- Make Sure you enable the conf site. For this you need to use following command :
$ a2ensite my_site
- Now restart apache server :
$ service apache2 restart
Now fire up your browser and navigate to https://your_host_name.com . Here you can see your site is working properly.
Congratulations !! your wordpress website is successfully deployed on the server and now you know how to move wordpress site on the server.

Shyam Verma
Full Stack Developer & Founder
Shyam Verma is a seasoned full stack developer and the founder of Ready Bytes Software Labs. With over 13 years of experience in software development, he specializes in building scalable web applications using modern technologies like React, Next.js, Node.js, and cloud platforms. His passion for technology extends beyond coding—he's committed to sharing knowledge through blog posts, mentoring junior developers, and contributing to open-source projects.