How to Deploy a React Native iOS App on the App Store
Step-by-step process to deploy a React Native app on the App Store
Prerequisites
Before deploying your app to the App Store, you'll need the following information:
- App Name
- 5 screenshots from a real iPhone
- App description
- Keywords
- Dummy Account (if app requires login)
Step 1: Get Your App Ready to Deploy
You can use react-native init NewProject to create a fresh new project or use your existing React Native project. In our scenario, we're cloning the app from GitLab. Once the app is cloned, navigate to your app's root directory and run npm install.
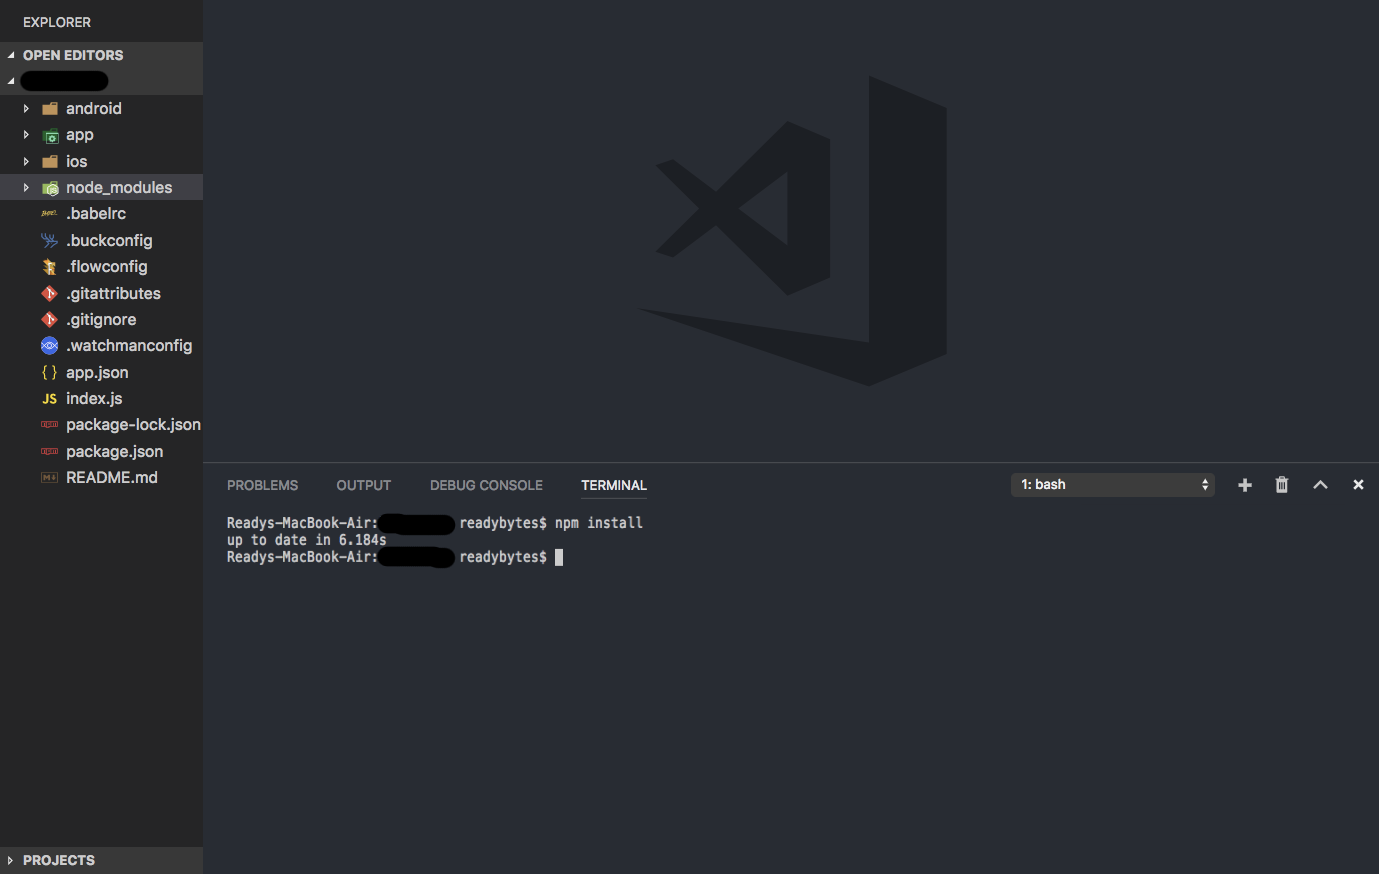
Once npm install executes successfully, change to the iOS directory using cd ios and run pod install.
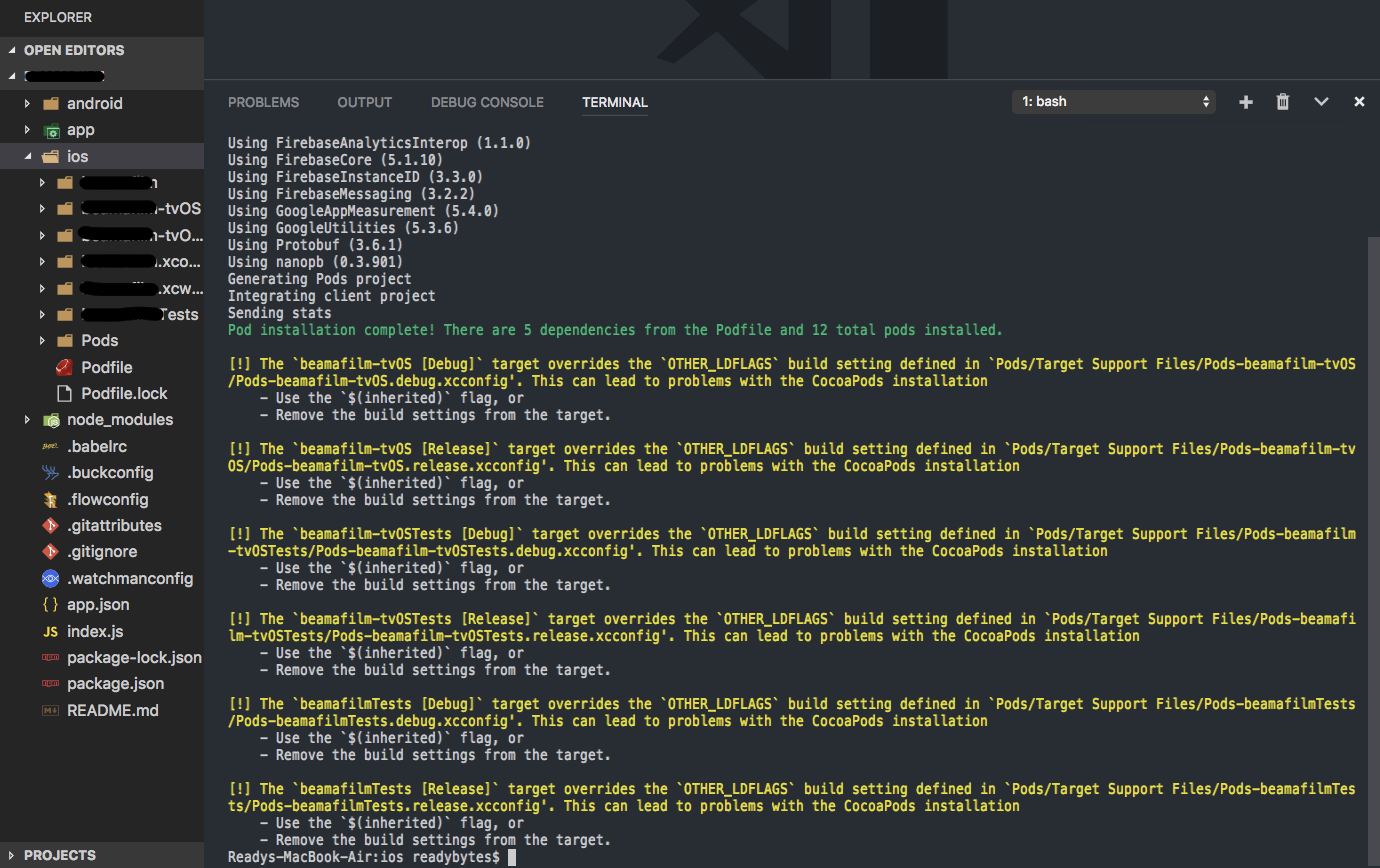
If both commands execute successfully, it's time to build the app.
Step 2: Build the App in Xcode
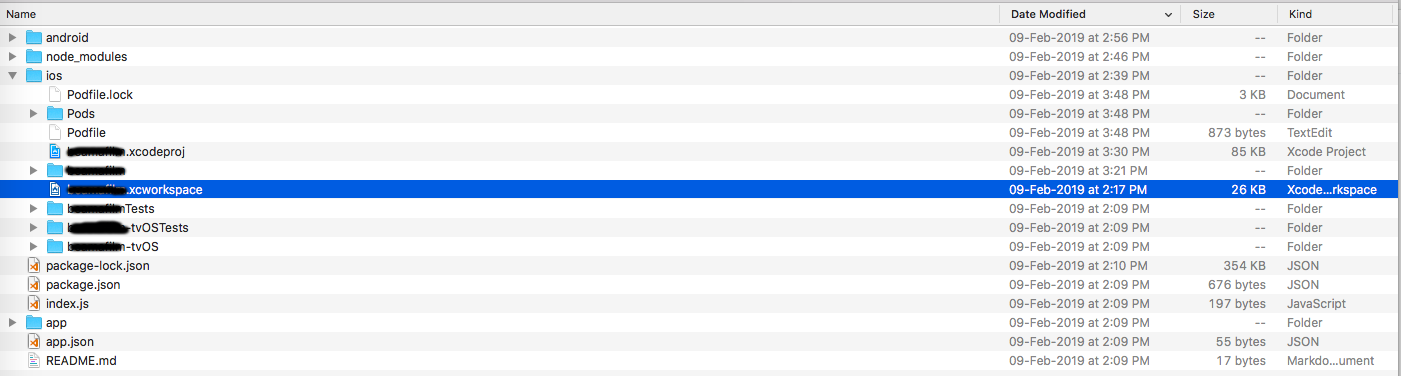
Open your project folder in Xcode. If you've configured Firebase with your app, navigate to the iOS directory and select the file with the .xcworkspace extension; otherwise, select .xcodeproj. Now it's time to change some settings for your app's behavior.
1. Update General Settings
Click on the General tab and navigate to Identity to update all the details. Make sure the bundle identifier is correct as mentioned in the project. If you don't know how to get the bundle identifier, navigate to project_name → ios → project_name.xcodeproj and open project.pbxproj, then find PRODUCT_BUNDLE_IDENTIFIER.
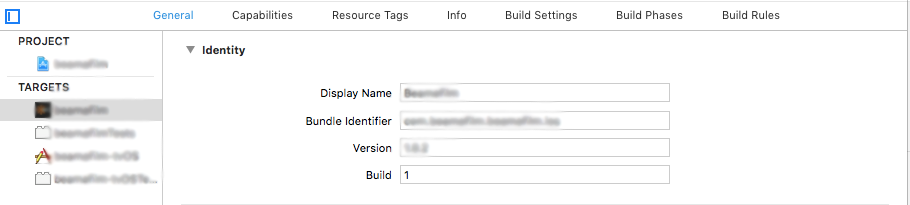
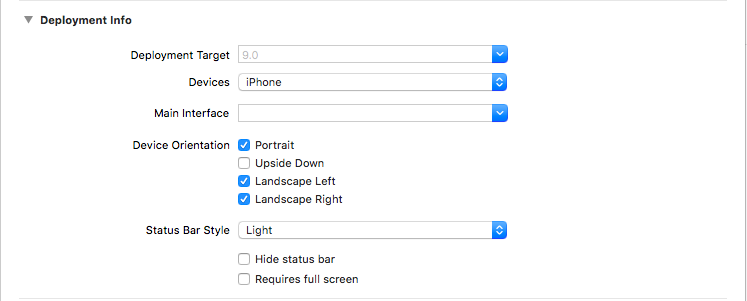
Now navigate to Development Info where you can change the basic functionality of your app, such as portrait mode and landscape mode.
2. Update Capabilities
If your app has push notification services, select the Capabilities tab and turn on Background Mode, then check Remote notifications.
After that, turn on Push Notification. If your app has more features like Maps or Siri, you can turn them on or off here.
3. Change Scheme (Developer Mode)
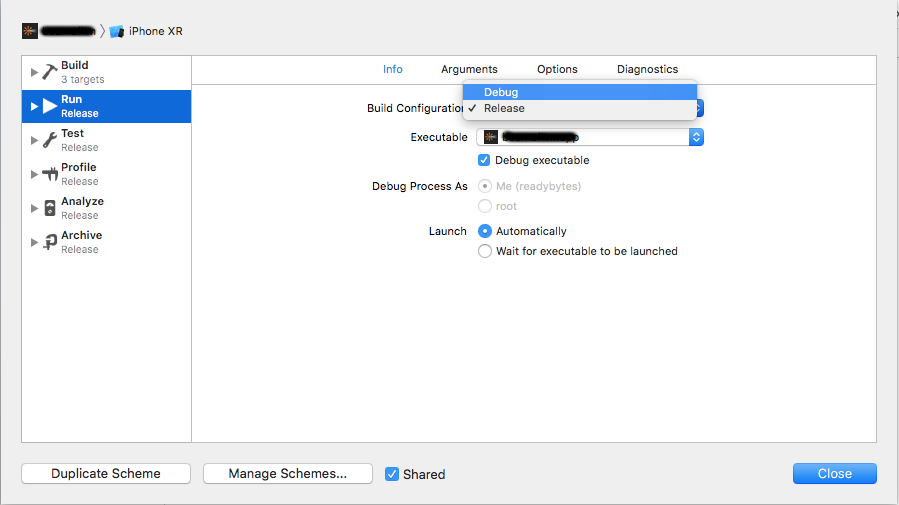
Once the initial settings are updated and if you want to install the app in debug mode, navigate to the top of Xcode and select Product → Scheme → Edit Scheme.
Change Build Configuration to Debug and do the same for Test, Profile, Analyze, and Archive tabs, then close the popup.
4. Start the Build
To build the app, select Product from the top of the menu bar and navigate to Product → Build. This will start building the app, which will take a little time.
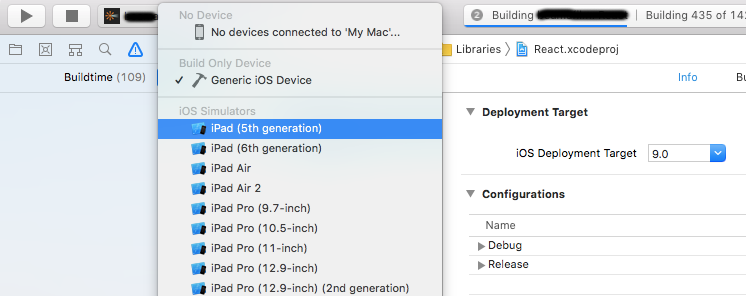
5. Run App in Emulator or Real Device
Once the build completes successfully, if you want to run the app in an emulator or real device, navigate to the top right corner and select your device emulator or real device (the real device should be connected to your Mac). Then run the build by clicking the play button, and the app will launch on the respective device.
Step 3: Create App ID in Apple Developer Account
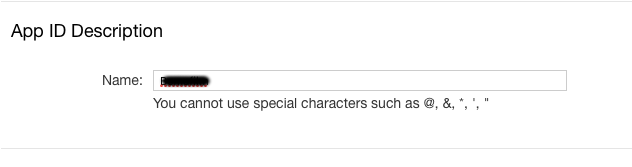
Log in to your developer account and select Certificates, IDs & Profiles, then navigate to Identifiers → App IDs and click the add button. Update your app name and click Continue.
After that, update the Bundle ID and make sure it's the same as the package name.
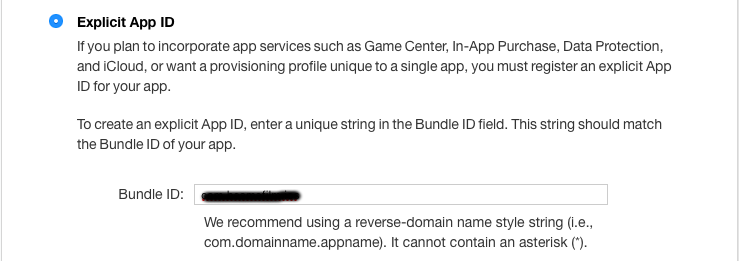
Since we're using push notifications in our app, check the Push Notification option in App Services, then click Continue.

Check all the configuration carefully and click Register. You've now successfully created an App ID.
Step 4: Create Certificates for the App
In iOS apps, two types of certificates are available: Development and Production. Both can be generated from Keychain Access on Mac. Once the certificates are generated, they can be used here.
Since we're using Push Notification services in our app, we need to create separate certificates for Development and Production. Follow these steps to create APN certificates.
For Development
1. Create Certificates for Development
The development certificate is autoloaded when you request a CSR (Certificate Signing Request) in Keychain Access, so make sure you've downloaded the CSR from your Keychain Access account.
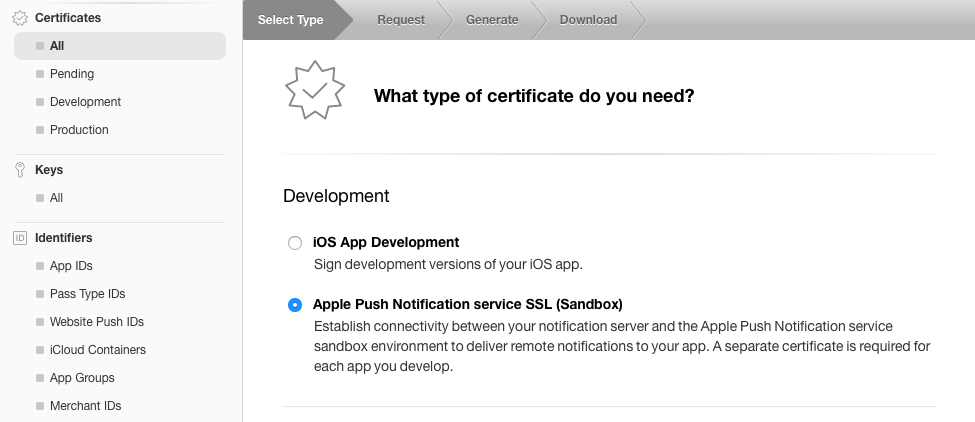
2. Create APN Certificates for Development (if app has push notifications)
To create the development APN certificate in your developer account, navigate to Certificates → Development and click the add button to create a new certificate. In the Development section, select APN (Apple Push Notification) and proceed to Continue.
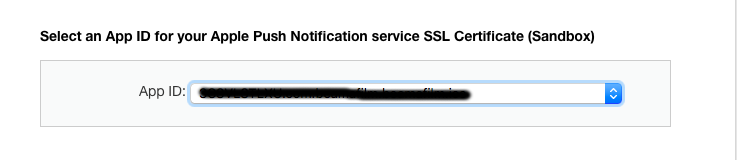
Now select the App ID you created earlier and proceed to Continue.
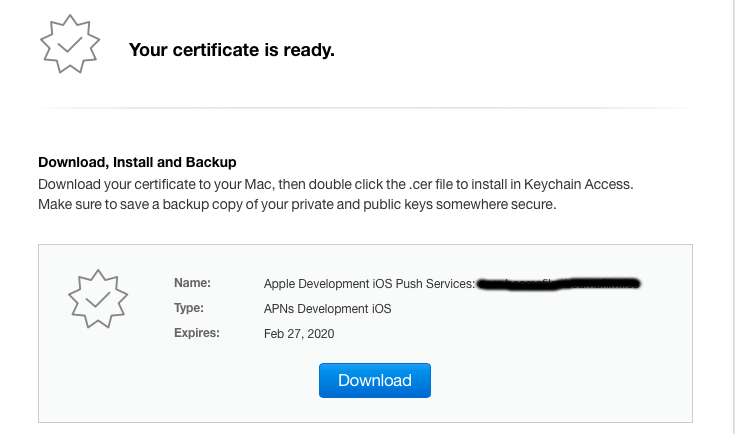
In the Generate section, select the CSR (Certificate Signing Request) file from your Keychain Access account, then proceed to Continue. The APN certificate can now be downloaded.
Once you've downloaded the certificate, browse to it and double-click to save it in your Keychain account.
For Production
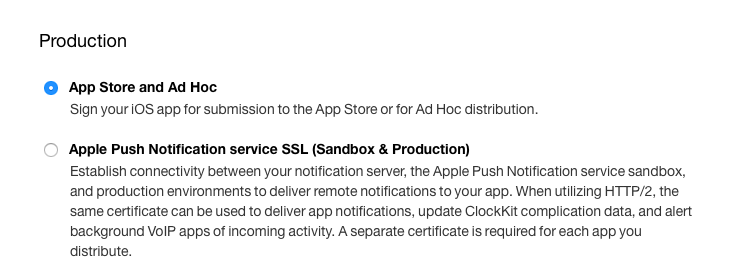
1. Create Certificates for Production
To create the production certificate in your developer account, navigate to Certificates → Production and click the add button to create a new certificate. In the Production section, select App Store and Ad Hoc, then proceed to Continue.
Now select the App ID you created earlier and proceed to Continue.

In the Generate section, select the CSR (Certificate Signing Request) file from your Keychain Access account, then proceed to Continue. The APN certificate can now be downloaded.
Once you've downloaded the certificate, browse to it and double-click to save it in your Keychain account.
2. Create APN Certificates for Production (if app has push notifications)
To create the production APN certificate in your developer account, navigate to Certificates → Production and click the add button to create a new certificate. In the Production section, select APN (Apple Push Notification) and proceed to Continue.

Now select the App ID you created earlier and proceed to Continue.
In the Generate section, select the CSR (Certificate Signing Request) file from your Keychain Access account, then proceed to Continue. The APN certificate can now be downloaded.
Once you've downloaded the certificate, browse to it and double-click to save it in your Keychain account.
Step 5: Create Provisioning Profiles
To deploy the app on the App Store, we need to create Provisioning Profiles for both Development and Distribution. Follow these steps to create the provisioning profiles:
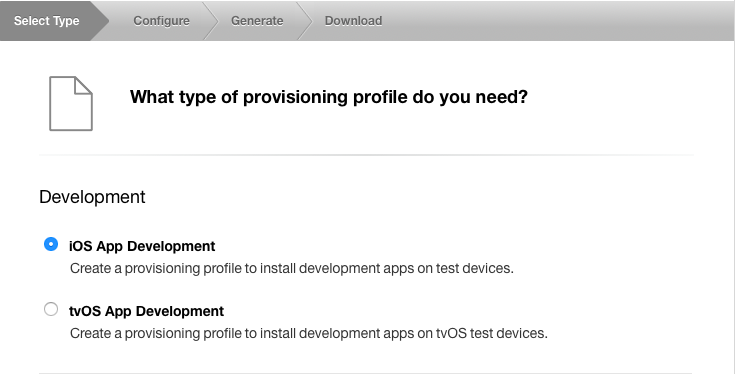
For Development Provisioning Profile
To create a provisioning profile, log in to your developer account and select Certificates, Identifiers & Profiles. Navigate to Provisioning Profile → Development and click the add button. In the Development section, select iOS App Development and proceed to Continue.
Now select the App ID you created earlier and proceed to Continue.
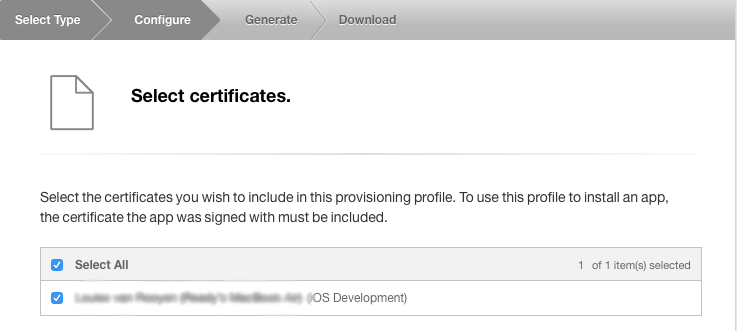
Now select the development certificate you created earlier and proceed to Continue.
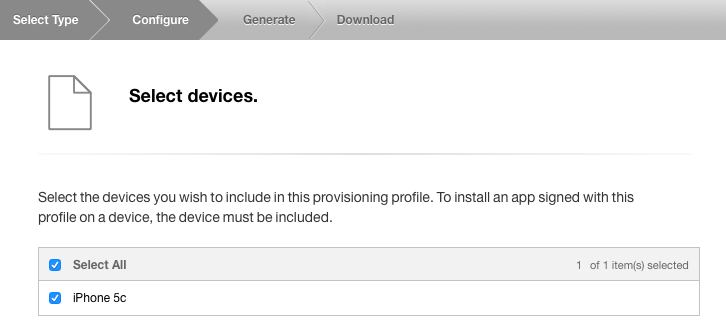
Now select a device. If no devices have been added before, they can be created from the Devices tab. In our case, we've selected iPhone 5c.
Once the device is selected, update the profile name and proceed to Continue.
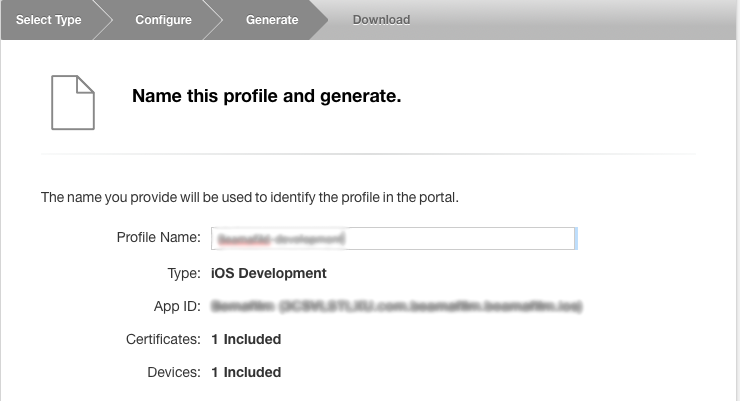
The provisioning profile for development is created successfully. Download it and double-click to save it in your Keychain account.
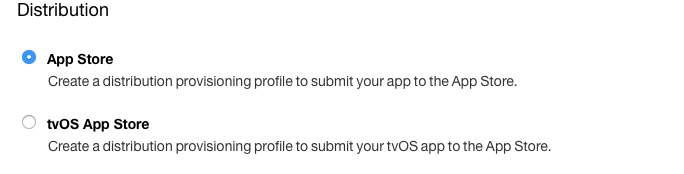
For Distribution Provisioning Profile
To create a distribution provisioning profile, navigate to Provisioning Profile → Distribution and click the add button. In the Distribution section, select App Store and proceed to Continue.
Step 6: Release the App on the App Store in TestFlight Mode
Now we're very close to deploying the app on the App Store. TestFlight is the mode where you can test your app on an iPhone device. In the following steps, we're going to release our app on the App Store in test mode.
1. Create New App in App Store Connect
Before publishing the app, we need to create a new app on App Store Connect. Log in to your App Store account and click on "My Apps".
Click on the plus icon in the top left corner and select "New App". After that, select the bundle ID for the app that you created earlier in the developer account.
2. Rebuild the App with Xcode and Update Build Settings
Open your project_name → ios → project_name.xcworkspace (or .xcodeproj if you didn't integrate Firebase) file in Xcode and navigate to the Build Settings tab.
In Code Signing Identity → Debug and Code Signing Identity → Debug → Any iOS SDK, select the Developer certificate you created earlier.


After that, in Code Signing Identity → Release and Code Signing Identity → Release → Any iOS SDK, select the Distribution certificate you created earlier.


Once you've made all the changes, before building the app make sure all tabs in Product → Scheme → Edit Scheme are set to Release mode. Now you're ready to build the app. Navigate to Product → Clean Build Folder and then navigate to Product → Build.
3. Archive the Project
Now it's time to archive the project. Before archiving, make sure you've selected "Generic iOS Device" in the top left corner of your window. Once you've done that, navigate to Product → Archive. Once the app is successfully archived, you'll automatically be redirected to the Xcode Organizer window.
4. Upload App to TestFlight
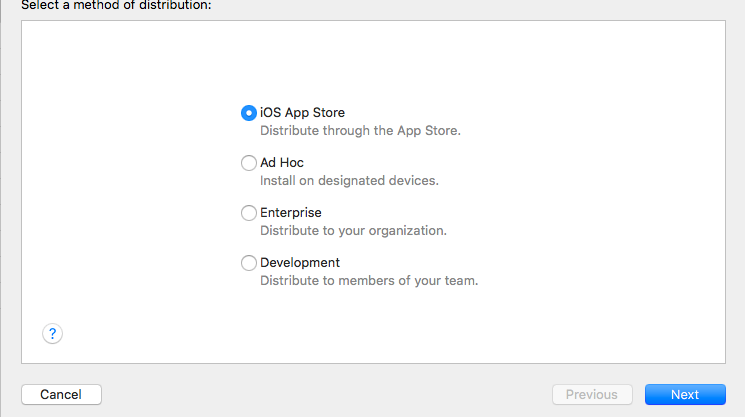
Once the app is successfully archived, you'll see a list of apps with the version in Xcode Organizer. Select this app and click on Distribute App.

Now you'll see distribution methods. Select iOS App Store and click Next.
You'll see two options: Upload or Export. Since we're uploading the app, select Upload and click Next.

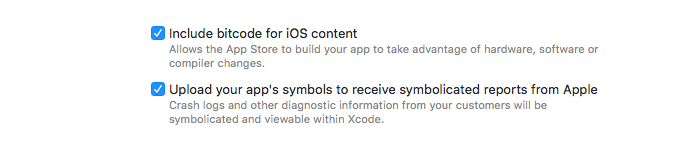
You'll see two more options that are selected by default. Leave them as is and click Next.
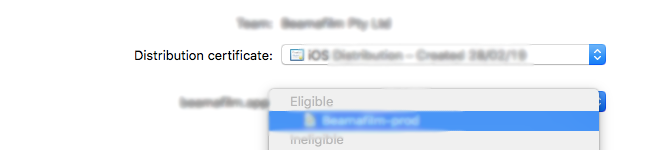
Now it's time to select the certificates you created earlier. Since we're distributing this app to production, we need to select two certificates: one for distribution and one for production. In Distribution Certificate, select your distribution certificate.

In project_name.app, select your production certificate and click Next.
Once you click Next, it will take a little time to identify your certificates. After that, you'll see details of your app that you're going to upload to the App Store.
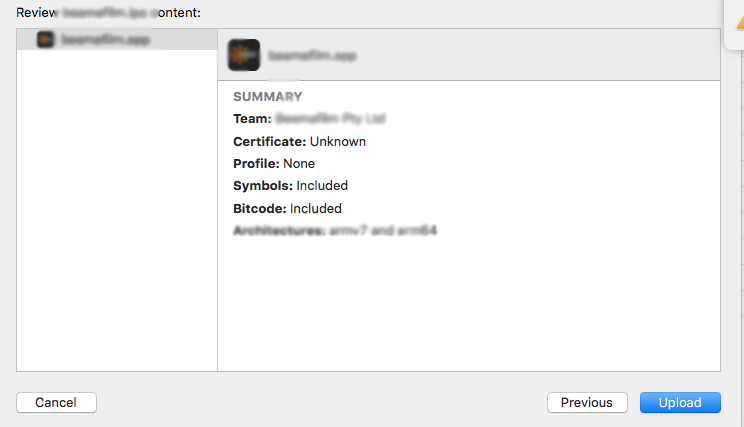
Now click "Upload" to upload your app to the App Store. It will take a little time to upload the app. Once the app is uploaded, click "Done" and it's time to log in to your App Store or iTunes account.
Once your app is uploaded to TestFlight, log in to your App Store account and click "My Apps", then navigate to Your App → TestFlight. Here you'll see your app with a "Processing" tag.
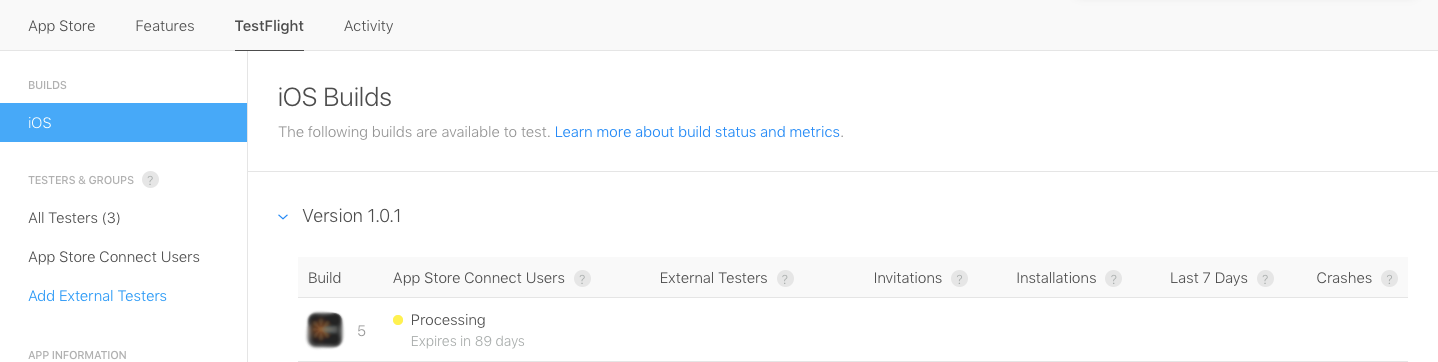
Once the processing is complete, you'll see a warning icon as shown in the image. Click on this icon and then click on "Provide Export Compliance Information".

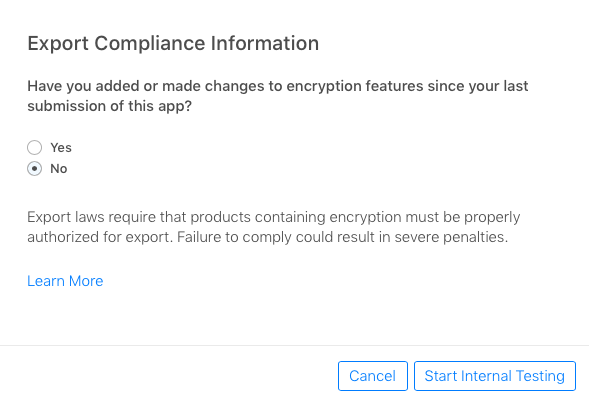
A popup will appear asking you about Export Compliance Information. In our case, we don't have any encryption features, so select "No" and click "Start Internal Testing". The app will be available in testing mode. You can test your app with the TestFlight app available on the App Store. To test this app, you need to add testers for this particular app in your App Store account.
Step 7: Move Your App from TestFlight to Production
Now it's time to move your app to production so it will be available for your users. Following are the steps to move your app from TestFlight to production.
First, log in to your App Store account and navigate to My App → Your App and click on the App Store tab.
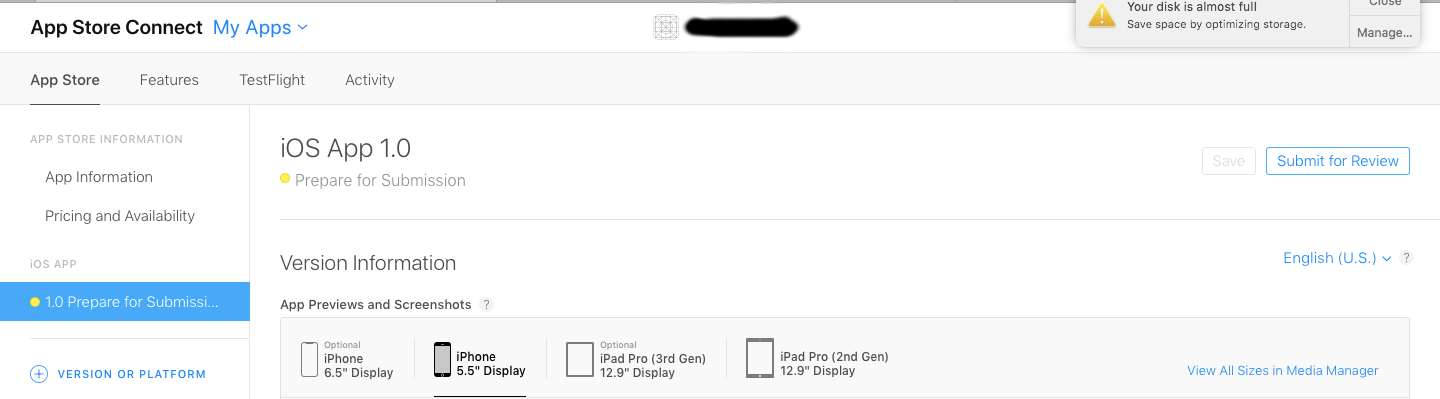
1. If You're Uploading a Fresh App to the App Store
If you're uploading your app for the first time, you'll see "1.0 Prepare for Submission" in the left sidebar under iOS App. Click on it.
2. If You Want to Update Your App Version (Skip for Fresh Apps)
If you've uploaded your app to production before and want to update it, click on VERSION OR PLATFORM and a popup will appear with two options. Select iOS.
Now enter the new version of your app and click "Create". You'll find the Prepare for Submission tab with your version. Click on it.

3. Fill Out App Details and Select Build
Here you'll see a screen where you need to fill out all the information about the app.
It's time to select the build you uploaded to TestFlight. Scroll down and you'll find a Build tab. Click on Select a build before you submit your app and a popup will appear with all the uploaded apps on TestFlight.

Click on the app you want to move to production and click "Done". Now fill out all the information for your app, including screenshots.
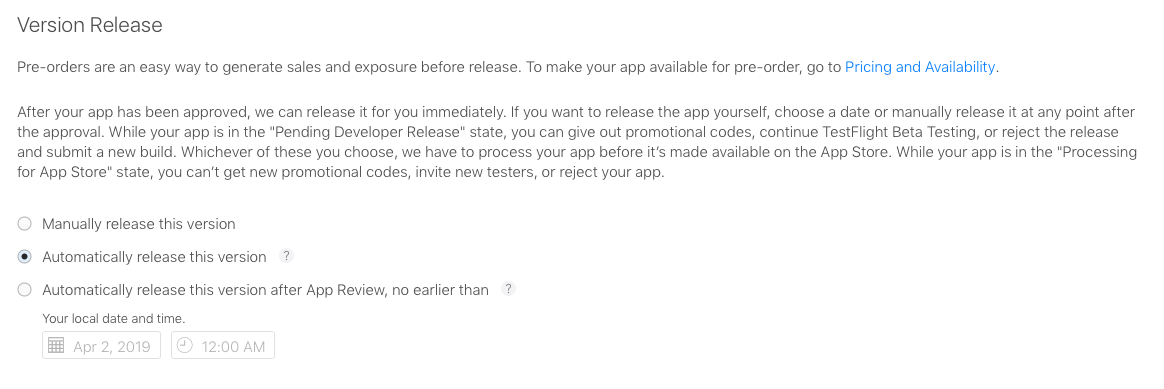
4. Version Release
Once you've filled out all the details of the app, in the Version Release tab you can choose how you want to release your app.
5. Submit for Review
Now it's time to submit your app. Click the "Save" button and then click "Submit for Review" from the top right corner.
After that, the App Store will ask whether your app has advertisements. After selecting the appropriate option, click "Submit for Review" and your app will be under review. The time taken in the review process depends on the App Store. Once your app is reviewed successfully, it will be moved to production.

Shyam Verma
Full Stack Developer & Founder
Shyam Verma is a seasoned full stack developer and the founder of Ready Bytes Software Labs. With over 13 years of experience in software development, he specializes in building scalable web applications using modern technologies like React, Next.js, Node.js, and cloud platforms. His passion for technology extends beyond coding—he's committed to sharing knowledge through blog posts, mentoring junior developers, and contributing to open-source projects.